4.5
这几天看了一些maya savvy,感觉看起来有点困难了,一方面是书上的图不很清楚,最重要的还是书上讲的太简略.所以决定回过头来继续读fundamentals.
chapter 3. maya interaction
You have the following options for adding and subtracting selections:
Toggling the selection: Use the Shift key to select and deselect objects. Each click on the same object toggles its selection. The last object selected is a unique color (green by default), and the other selected objects indicate their selection by a color change in the wireframe (white by default).
Subtracting from a selection: Ctrl+clicking on an object (or Ctrl+ marquee selecting over multiple objects) in the viewport always deselects.
Adding to a selection: Shift+Ctrl+click (or Shift+Ctrl+marquee selecting over multiple objects) always selects objects.
Inverting the selection: Shift+clicking on an object (or Shift+marquee selecting over multiple objects) reverses its selection state.
*调整manipulator's size, what are the keys?
*the move tool:ctrl + clicking on and axes arrow.
mmb+dragging,shift+mmb+drag.
4.6
*snap to curve: is very hard.
Curve and point snapping are similar(snap to grid), but you need to specify the curve or point of a deselected object. To do this, you hold down the snap-to key (c or v) and then MMB-click on the edge or point of the target object.
4.28
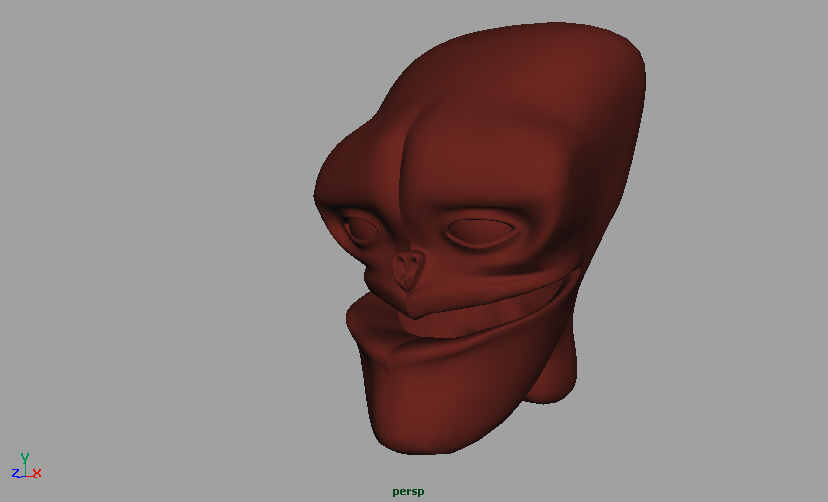
近些日子又有选择的看了这本书的初级建模的polygon部分,正在建一个creature's head.
用到的主要技术是:smooth proxy.(maybe from v4/4.5)+duplicate(instance)但在v3可以通过在hypergraph里编辑节点连接来模拟这种技术.
+split polygons(eye,mouth)
Summary
There are many applications for modeling with polygons, but in this chapter you have learned a primary use for them梕mulating Subdivision Surfaces modeling. Using the tools you learned in this chapter, you can create many kinds of detailed organic shapes. Some of the tools you've used include the following:
Image planes You can import drawings or blueprints into an orthogonal view to aid your modeling.
Split Polygon Tool This tool allows you to add detail where needed when modeling in the simulated Subdivision Surfaces technique.
Extruding polygons Using extrusions is another method for adding detail to a simulated Subdivision polygonal surface. Extrudes are ideal for adding bulges or indentations.
Smooth Proxy You used the Smooth Proxy to subdivide the Cage duplicate and create the final tessellated character.
Creating instances By duplicating as an instance, edits to one side were mirrored in the other.
图片如下:
NURBS建模基础部分
Summary
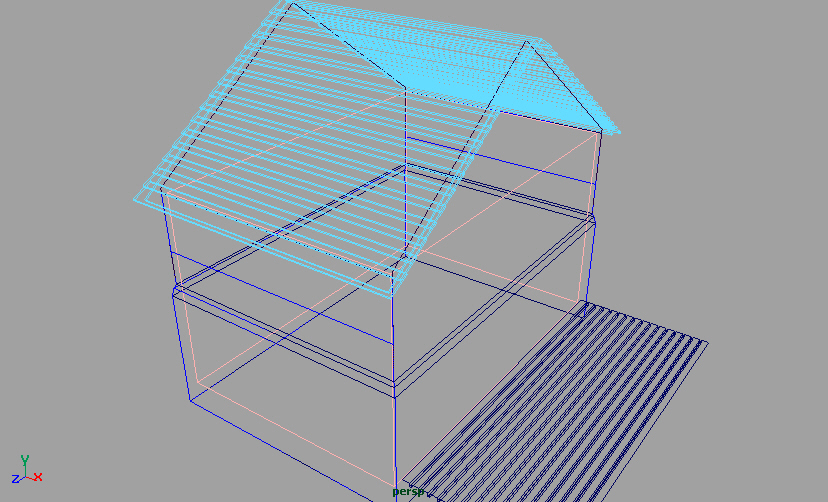
In this chapter, you have explored the standard approaches to modeling with NURBS, focusing on architectural modeling. You have also practiced the following techniques:
Creating and editing NURBS primitives You learned to use cubes as a starting point for modeling, and then how to delete parts of primitives or take their endpoints and move them around.
Engaging snapping when needed You can temporarily turn on grid snapping to make more precise model edits.
Using the Channel Box for numeric entry You can use this tool to enter precise size and position settings.
Creating curves You can draw lines that are later used for extrusion, lofting, or many other modeling creation methods.
Merging surfaces You merge surfaces to get a temporary surface on which to project a line.
Extruding curves You learned this skill for simple extrusions from any curve.
Lofting to connect lines Any two lines can be lofted together to create a surface.
Using Construction History to manipulate surfaces The history allows you to work with previous steps that have led to an object's current state (for example, moving a CV on a curve that created a loft will change the lofted surface).
Basic trims Trimming allows you to "slice" off portions of surfaces.
Using layers You can easily hide scene elements and organize your scene.
图片如下:
06.04
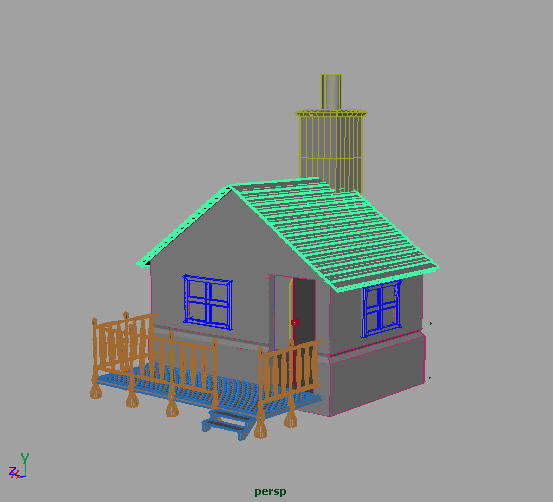
完成chapter6.more nurbs modeling 里的练习oldhouse,前前后后大约做了一个月.
总的感觉是事先准备不充分,或者没有完全按照书里给的例子制作,导致有些地方无法精确.例如,本来向外开的门,由于做的太靠下而不得不向里开,但大方向基本没有问题,技术\技巧基本都能领会.(这是一本好书,就是看起来有点慢)
summary
Having worked through the stages of creating this house, you've learned a number of complex modeling operations. You've mixed the modeling techniques of modifying simple primitives and creating surfaces from curves. These methods point the way to exploring the option boxes and experimenting with creating and modifying NURBS surfaces. Here are some of the skills you learned in this chapter that you need to keep practicing:
Curve snapping Forcing objects to track to any curve or edge in your scene.
Trims from projections Creating projected curves on two surfaces to allow for easy trimming.
Rebuilding surfaces When you need more detail for editing, rebuild the surface with more divisions.
Revolving surfaces Creating a half-profile of an object and revolving it to create a lathed effect.
Attaching surfaces Combining separately created surfaces that share edges.
Lofting from isoparms Any edge of an existing surface can be used as a starting point to loft to other curves.
Connecting shapes with planar surfaces If one curve surrounds another, and the two curves are co-planar, you can easily create a planar surface, ideal for capping holes.
Adjusting curves already used to make surfaces Surfaces based on curves change when the source curve is altered, as long as history is recorded for the object.
Maya's earliest versions focused on NURBS modeling, the more versatile approach for many models because of the ease of displaying a surface and changing the level of detail. For many purposes (such as creating characters for games), however, polygon modeling is the better method. Maya's polygon modeling capability has become as full-featured as NURBS modeling, and you'll explore polygon modeling in detail in the next chapter.
(other tips etc.)
The CV Hardness tool works only if there are two CVs on each side with a multiplicity of 1 (that is, CVs other than the start and end points).
If you want to make a hard corner, place three sequential points in the same place. If you want a softer corner, put two sequential points in the same place.
图片如下:
07.01
过一段时间回味一下应该算是一个好的习惯.
最近的MAYA学习基本上以fundamentals为中心了,一边学技术,一边学英语,感觉还不错.任何东西,长时间的接触就会产生麻木的感觉,学习也是这样,有时会麻木,甚至厌倦.但稍微兜点小圈子之后,又会重新回到原来的轨道上.前阵子因为MAYA工作一段时间就变得响应慢的问题,非常恼火,于是有了接触一下lightwave的想法,因为它对资源占用比较低.但3D软件都是那么繁杂,上手不太容易,况且时间也不多,还是将就这一个吧.用回来之后,还是挺喜欢的,也许是因为换成了XP了吧?以前的响应慢的问题暂时还没有发现.心下窃喜!
先想问题,建模练习的还是不够多,没有大量的练习是不行的,切记.
收获好象是逐渐养成了好的学习习惯,知识在一点一点地累积,经验在慢慢慢慢地增长,这些都带来了很多乐趣.另外,最近几个月以前定下的那个目标时常在脑子里出现,或者说是近期的一个基本的梦想,那就是--将陪伴了自己十三年的搪瓷杯子做出来,要真实的.要尽快做出来,而迫切需要解决的就是贴图的问题.
这几天看了一些maya savvy,感觉看起来有点困难了,一方面是书上的图不很清楚,最重要的还是书上讲的太简略.所以决定回过头来继续读fundamentals.
chapter 3. maya interaction
You have the following options for adding and subtracting selections:
Toggling the selection: Use the Shift key to select and deselect objects. Each click on the same object toggles its selection. The last object selected is a unique color (green by default), and the other selected objects indicate their selection by a color change in the wireframe (white by default).
Subtracting from a selection: Ctrl+clicking on an object (or Ctrl+ marquee selecting over multiple objects) in the viewport always deselects.
Adding to a selection: Shift+Ctrl+click (or Shift+Ctrl+marquee selecting over multiple objects) always selects objects.
Inverting the selection: Shift+clicking on an object (or Shift+marquee selecting over multiple objects) reverses its selection state.
*调整manipulator's size, what are the keys?
*the move tool:ctrl + clicking on and axes arrow.
mmb+dragging,shift+mmb+drag.
4.6
*snap to curve: is very hard.
Curve and point snapping are similar(snap to grid), but you need to specify the curve or point of a deselected object. To do this, you hold down the snap-to key (c or v) and then MMB-click on the edge or point of the target object.
4.28
近些日子又有选择的看了这本书的初级建模的polygon部分,正在建一个creature's head.
用到的主要技术是:smooth proxy.(maybe from v4/4.5)+duplicate(instance)但在v3可以通过在hypergraph里编辑节点连接来模拟这种技术.
+split polygons(eye,mouth)
Summary
There are many applications for modeling with polygons, but in this chapter you have learned a primary use for them梕mulating Subdivision Surfaces modeling. Using the tools you learned in this chapter, you can create many kinds of detailed organic shapes. Some of the tools you've used include the following:
Image planes You can import drawings or blueprints into an orthogonal view to aid your modeling.
Split Polygon Tool This tool allows you to add detail where needed when modeling in the simulated Subdivision Surfaces technique.
Extruding polygons Using extrusions is another method for adding detail to a simulated Subdivision polygonal surface. Extrudes are ideal for adding bulges or indentations.
Smooth Proxy You used the Smooth Proxy to subdivide the Cage duplicate and create the final tessellated character.
Creating instances By duplicating as an instance, edits to one side were mirrored in the other.
图片如下:

NURBS建模基础部分
Summary
In this chapter, you have explored the standard approaches to modeling with NURBS, focusing on architectural modeling. You have also practiced the following techniques:
Creating and editing NURBS primitives You learned to use cubes as a starting point for modeling, and then how to delete parts of primitives or take their endpoints and move them around.
Engaging snapping when needed You can temporarily turn on grid snapping to make more precise model edits.
Using the Channel Box for numeric entry You can use this tool to enter precise size and position settings.
Creating curves You can draw lines that are later used for extrusion, lofting, or many other modeling creation methods.
Merging surfaces You merge surfaces to get a temporary surface on which to project a line.
Extruding curves You learned this skill for simple extrusions from any curve.
Lofting to connect lines Any two lines can be lofted together to create a surface.
Using Construction History to manipulate surfaces The history allows you to work with previous steps that have led to an object's current state (for example, moving a CV on a curve that created a loft will change the lofted surface).
Basic trims Trimming allows you to "slice" off portions of surfaces.
Using layers You can easily hide scene elements and organize your scene.
图片如下:

06.04
完成chapter6.more nurbs modeling 里的练习oldhouse,前前后后大约做了一个月.
总的感觉是事先准备不充分,或者没有完全按照书里给的例子制作,导致有些地方无法精确.例如,本来向外开的门,由于做的太靠下而不得不向里开,但大方向基本没有问题,技术\技巧基本都能领会.(这是一本好书,就是看起来有点慢)
summary
Having worked through the stages of creating this house, you've learned a number of complex modeling operations. You've mixed the modeling techniques of modifying simple primitives and creating surfaces from curves. These methods point the way to exploring the option boxes and experimenting with creating and modifying NURBS surfaces. Here are some of the skills you learned in this chapter that you need to keep practicing:
Curve snapping Forcing objects to track to any curve or edge in your scene.
Trims from projections Creating projected curves on two surfaces to allow for easy trimming.
Rebuilding surfaces When you need more detail for editing, rebuild the surface with more divisions.
Revolving surfaces Creating a half-profile of an object and revolving it to create a lathed effect.
Attaching surfaces Combining separately created surfaces that share edges.
Lofting from isoparms Any edge of an existing surface can be used as a starting point to loft to other curves.
Connecting shapes with planar surfaces If one curve surrounds another, and the two curves are co-planar, you can easily create a planar surface, ideal for capping holes.
Adjusting curves already used to make surfaces Surfaces based on curves change when the source curve is altered, as long as history is recorded for the object.
Maya's earliest versions focused on NURBS modeling, the more versatile approach for many models because of the ease of displaying a surface and changing the level of detail. For many purposes (such as creating characters for games), however, polygon modeling is the better method. Maya's polygon modeling capability has become as full-featured as NURBS modeling, and you'll explore polygon modeling in detail in the next chapter.
(other tips etc.)
The CV Hardness tool works only if there are two CVs on each side with a multiplicity of 1 (that is, CVs other than the start and end points).
If you want to make a hard corner, place three sequential points in the same place. If you want a softer corner, put two sequential points in the same place.
图片如下:

07.01
过一段时间回味一下应该算是一个好的习惯.
最近的MAYA学习基本上以fundamentals为中心了,一边学技术,一边学英语,感觉还不错.任何东西,长时间的接触就会产生麻木的感觉,学习也是这样,有时会麻木,甚至厌倦.但稍微兜点小圈子之后,又会重新回到原来的轨道上.前阵子因为MAYA工作一段时间就变得响应慢的问题,非常恼火,于是有了接触一下lightwave的想法,因为它对资源占用比较低.但3D软件都是那么繁杂,上手不太容易,况且时间也不多,还是将就这一个吧.用回来之后,还是挺喜欢的,也许是因为换成了XP了吧?以前的响应慢的问题暂时还没有发现.心下窃喜!
先想问题,建模练习的还是不够多,没有大量的练习是不行的,切记.
收获好象是逐渐养成了好的学习习惯,知识在一点一点地累积,经验在慢慢慢慢地增长,这些都带来了很多乐趣.另外,最近几个月以前定下的那个目标时常在脑子里出现,或者说是近期的一个基本的梦想,那就是--将陪伴了自己十三年的搪瓷杯子做出来,要真实的.要尽快做出来,而迫切需要解决的就是贴图的问题.
回复Comments
作者:
{commentrecontent}